Picture this: you’ve found the perfect camp spot some 200 miles from the nearest town and have been hiking for days, followed by nights with your toes hovering over the campfire. It’s your own little slice of heaven. Yet you have to admit, when you take off your socks, they could probably stand on their own. You may even wonder if they’ll take off on the next hike without you. The idea, however, of packing up and driving into town to find the nearest laundromat sends shivers down your spine.
For a number of RVers, an onboard washer and dryer solves this challenge. It may be one of the most talked-about upgrades on the road—right up there with a comfortable mattress and a reliable coffee maker. Some suggest that doing a load of laundry in your PJs while parked next to a mountain lake solidified that this is the life for them.
Before you start tearing out a closet and ordering a new combo unit, though, there’s a lot to know about onboard laundry. Yes, it can genuinely be life-changing. And for those who live on the road, it can become a necessity they wouldn’t want to live without. On the other hand, it can be a loud, vibrating, grey-tank-filled headache they never liked enough to use. After all, who wants to do laundry on their camping trip? Time is short!
The difference typically comes down to finding the right setup for your rig and your style of camping.
Today, we’re going to cut through the spin cycle of opinions (pun totally intended) with advice from real RVers who’ve made the commitment, cut the vent hole, and would do it again after finding the best RV washer and dryer for them.

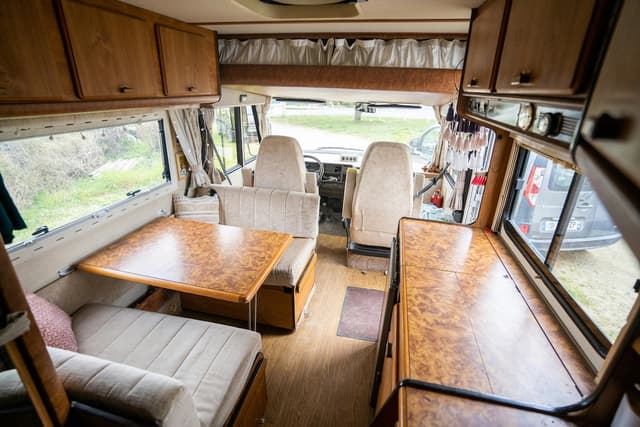
Photo by engin akyurt on Unsplash
Is Your Rig Setup for Laundry?
Before you fall into the rabbit hole of washer-dryer reviews, cost comparisons, and measurements, the first question isn’t which unit to buy. It’s whether your RV is ready for one at all.
Many newer, larger rigs are already pre-prepped for a washer and dryer. That is, they have a dedicated nook or closet that’s pre-plumped with hot and cold water hookups, an electrical connection, and a marked spot on the exterior to start drilling your vent hole (for those who choose a vented dryer).
If you see that little plastic panel with three connections (red for hot, blue for cold, and black PVC for the drain), you’re all set. One appliance-shopping trip will take you to laundry freedom.
On the other hand, if your RV doesn’t come pre-prepped, installation gets a whole lot more involved. And expensive. It’s not necessarily impossible. However, it’s worth chatting with your trusty RV technician before you start.
The next question, even if you are prepped and ready, is whether you can fit stackable separates or need a combo unit. In reality, this is usually dictated by your rig. A narrow space the size of a broom closet suggests a combo unit. A full-length wardrobe with dedicated laundry space? You may have room for stackable separates. As a rule of thumb, measure and then measure again to make sure you have the room for your chosen unit.
One last thing to check before you start looking for the right unit: your electrical situation. Most RV washer-dry units run on a standard 120V power and need a dedicated 15-amp circuit. If you’re running a 30-amp system, make sure you’re not already maxing out every time someone runs the AC and microwave at the same time. Adding a dryer to that party just means dealing with yet another flipped breaker and clothing that still isn’t clean, dry, and ready to wear.
The Real Pros and Cons—from RVers Who Actually Use Them
As the old saying goes, there’s no such thing as a free lunch. Trade-offs are always involved, maybe even more so when RVing. So, before you get too deep in your dreams of fresh, clean clothing on your next camping trip, it’s worth taking an honest look at the pros and cons.
The Pros
Convenience is clearly the biggest. No need to pull up stakes to hunt for a laundromat. No need to make change for machines. No need to haul your laundry bag through a packed parking lot in every type of weather. As one longtime RVer said: “Just toss in a dirty load before heading out for the day, and come back to clean, dry clothes.”
Can’t complain about that.
For full-timers and seasonal RVers especially, the math on packing also changes completely. Instead of bringing weeks’ worth of clothing, you can pack lighter, knowing you can always wash along the way. Your storage compartments (and likely back) will benefit.
The Cons
Let’s get real here. First, no matter how high-end the unit is, you’re likely looking at longer drying times than you’re used to. Often, significantly longer with full wash-and-dry cycles stretching anywhere from 3 to 8 hours. You can’t just toss in a load after dinner and expect it to be done before bed.
Your grey tank will also feel the impact. A single load of laundry can take 8 to 18 gallons of water—all of which drains into your grey tank. If you’re not on full hookups with a sewer connection, it’s important to time your laundry well. For example, wait until your last day at a site before moving on so you can dump before you drive, or plan for a mid-trip dump run.
It also won’t be a secret when you’re running a load. The spin cycle announces itself to everyone within a three-campsite radius. One RV described their whole RV rocking and rolling during the spin cycle. That may sound amusing. Until you’re the one chasing your coffee mug across the counter or feeling like you’ve been run through the spin cycle.
For those who choose a ventless unit, there’s one additional concern: moisture. It’s something most RVers are already actively trying to manage. And this can turn it up to 11. Even after a full dry cycle, most clothing will come out slightly damp, and interior humidity can creep up. If you’re in a dry area (say, Colorado, Arizona, New Mexico, and parts of Texas), that might not seem so bad. But if you’re already in a more humid climate, you may feel like you’ve transformed your RV into a terrarium, and all you have to put on are slightly damp clothes. You can fight some of the effects by cracking a window (especially in said dry regions). But you may need to invest in a good dehumidifier on top of that.
Finally, and we say this with great affection, but by installing your own onboard unit, you’ll completely miss out on meeting some of the most fascinating humans on the planet. That retired long-haul trucker with strong opinions about the best fabric softener. The couple that’s been full-timing for 11 years and will tell you everything about the area—from the best places to boondock for stargazing to how to manage a serious septic situation (with perhaps a little TMI). The mystery man meticulously folding what appears to be 17 identical T-shirts and shorts.
The shared campground laundry room can be a sociological goldmine. Do you really want to give all of that up?

Image by Gratisography
Vented vs. Ventless—The Decision That Matters Most
This one question will shape your onboard laundry experience more than any other. And the answer is… it depends.
Vented units work the same way as your home dryer. Hot, moist air gets pushed outside through a 4-inch vent hose through a hole in the side of your RV. Benefits include faster drying, less interior humidity, and dryer clothes at the end of the cycle. There’s just one little catch: you have to cut a hole in your RV.
Many RVers find this perfectly acceptable. It’s fairly fast and straightforward. Especially if your rig is pre-prepped with the vent location clearly marked. It’s something any good RV technician and many DIYers can handle.
Other RVers flinch at the mere suggestion of such a permanent alteration to their beautiful rig.
Ventless units allow you to skip the exterior hole, making installation considerably easier and less of a commitment. Instead of pushing moisture outside, they either use a condenser system or—in newer, more efficient models—a heat pump to pull moisture out of the air to drain right into your grey tank.
The tradeoff is longer drying times and clothing that can come out feeling, let’s just say, “humid.” The trick is to avoid folding and putting everything away immediately. Give it some air for a bit before you finish up. It gives you and your laundry time to relax and decompress before you get to folding.
It’s also worth noting that ventless technology has improved significantly. Newer heat pump ventless models are both more energy-efficient and effective than older condenser designs. They use considerably lower temperatures and less power, which is also better for the longevity of your clothing. They can genuinely be a solid option.

Photo by Blake Wisz on Unsplash
Best RV Washers and Dryers According to RVers
Fair warning: RVers can be opinionated when it comes to washer-dryer setups. And what one loves, another will suggest staying far away from. That said, we did find some clear patterns with a few names showing up repeatedly.
Vented:
The Splendid WD2100XC is, by a fairly wide margin, the most recommended combo unit across RV forums. Long-term users report years—and even decades—of reliable service. It handles up to 11 pounds (dry) of laundry and weighs around 148 pounds, and runs on standard 120V power. The vented version is the one to get if at all possible, as it dries faster, leads to less humidity, and has more happy camper recommendations.
A few caveats come up all the time: read the manual, use HE detergent, and do not overload it. One RVer said that most negative Splendid reviews can be attributed to those who don’t follow the directions, stuff it like a Thanksgiving turkey, and then complain that it doesn’t work.
Ventless:
Want to skip the exterior vent hole (or just not ready to make that type of commitment)? LG offers two solid heat pump options, depending on your available space.
The LG WashCombo All-in-One is, as the name suggests, a combo unit, which allows you to wash and dry in the same drum. A complete wash-and-dry cycle takes as little as 2 hours and uses a standard 120V plug. Again, since it’s ventless, as long as you have water and a drain, you can install it where it’s most convenient in your rig. Do, however, make sure you measure your space carefully to ensure it will actually fit.
If you have more vertical height to work with, the LG Compact WashTower (WKHC152HWA) may be a better fit. This stacked unit has separate drums for washing and drying in a single 24-inch-wide tower.
Its heat pump ventless dryer uses up to 65% less energy per load than a standard electric dryer, so you’ll pull less power at the campsite. While you’ll have to transfer clothing between cycles, the increased capacity and faster overall drying is a plus for many users.
Both units present a genuine leap forward from older condenser-style ventless machines.
Bosch and Whirlpool also receive high marks from the RV community for their stackable sets.
Generic and unbranded combo units, on the other hand, might look attractive—especially from a price point perspective—but RVers consistently say they aren’t worth it. Small drums, unreliable components, and slow drying times will test your patience (and perhaps your relationship). No-name brands in particular draw complaints—especially regarding moisture issues. It’s worth spending more upfront to avoid the aggravation and need to replace units more often.
Portable & Manual Washers
Campsites don’t always come with full hookups. In fact, some of the best ones don’t. In addition, not every RV has a laundry closet—or a spare corner. This is where portable and manual washers fit in.
Electric Portables can be surprisingly compact and capable. They connect to any standard faucet, drain into a bucket or sink, and tuck away in a cabinet when not in use.
The Magic Chef 1.7 cu.ft. portable top-loader gets consistent praise from RVers and Consumer Reports for its quiet operation and genuine cleaning ability. Impressive for a little device that weighs just under 73 pounds and costs less than half a typical washer.
It even has a delay-start feature, so you can set it before your morning hike and come back home to clean laundry, ready to be hung to dry. (Just don’t forget your portable clothes line.)

Photo by Ali Kazal on Unsplash
Low-Tech Heroes
For those who either do not have an electrical hookup or just want to save power, no problem. The WonderWash hand-crank washer has a devoted following, especially among boondockers and off-grid campers. It uses minimal water, requires no power, and handles small loads surprisingly well. It’s not going to tackle your full laundry load. But it’s good for keeping the essentials (think undergarments, hiking shirts, and those stand-up socks) fresh between laundry stops.
And of course, there’s always the original portable washing machine: a 5-gallon bucket. Combine that with a clean toilet plunger (only used for laundry!), a little elbow grease, and a little time. This tidy setup has been quietly getting campers through laundry emergencies for generations.
Simply fill your bucket with water and a small amount of HE detergent. Add in your clothes (don’t overstuff), plunge for several minutes, rinse, wring, and hang to dry. It may not be glamorous or fast, but it’s the most lightweight, affordable option, and it works anywhere. Fun Fact: John Steinbeck used a variation of this method during his cross-country journeys in Travels with Charley. So, you’ll be in excellent company.

Photo by Damien Dufour on Unsplash
A Few Last Tips for the Best RV Washers and Dryers
- Time your laundry days for your last day at a full-hookup site. That way, you can manage grey tank space and ensure you dump before you head out.
- Always use HE detergent as regular detergents can put undue stress on the pump and produce so many suds your machine could bubble over.
- Add airflow. Crack a window, run the vent fan, and/or keep a small dehumidifier handy—especially in the humid summer months.
- Read the manual. RVers are united on the point.
- Measure twice. Depth, especially, is a sneaky dimension that catches folks off guard. Some of the newer units need a few extra inches of clearance behind them. Make sure that space is available before you click buy.
Happy washing—may your loads be small and your grey tanks never full.